A natural flow that I've gotten used to over the years is using the option key (⌥) combined with the arrow keys to navigation between word boundaries in simple text editors. I also use this to quickly delete a word at a time rather than holding down the delete key.
Given this muscle memory, I was surprised that when I started using iTerm2 that this functionality wasn't supported out of the box. Especially since this is standard in the default Terminal app.

Below are the instructions needed to enable this behavior.
Settings
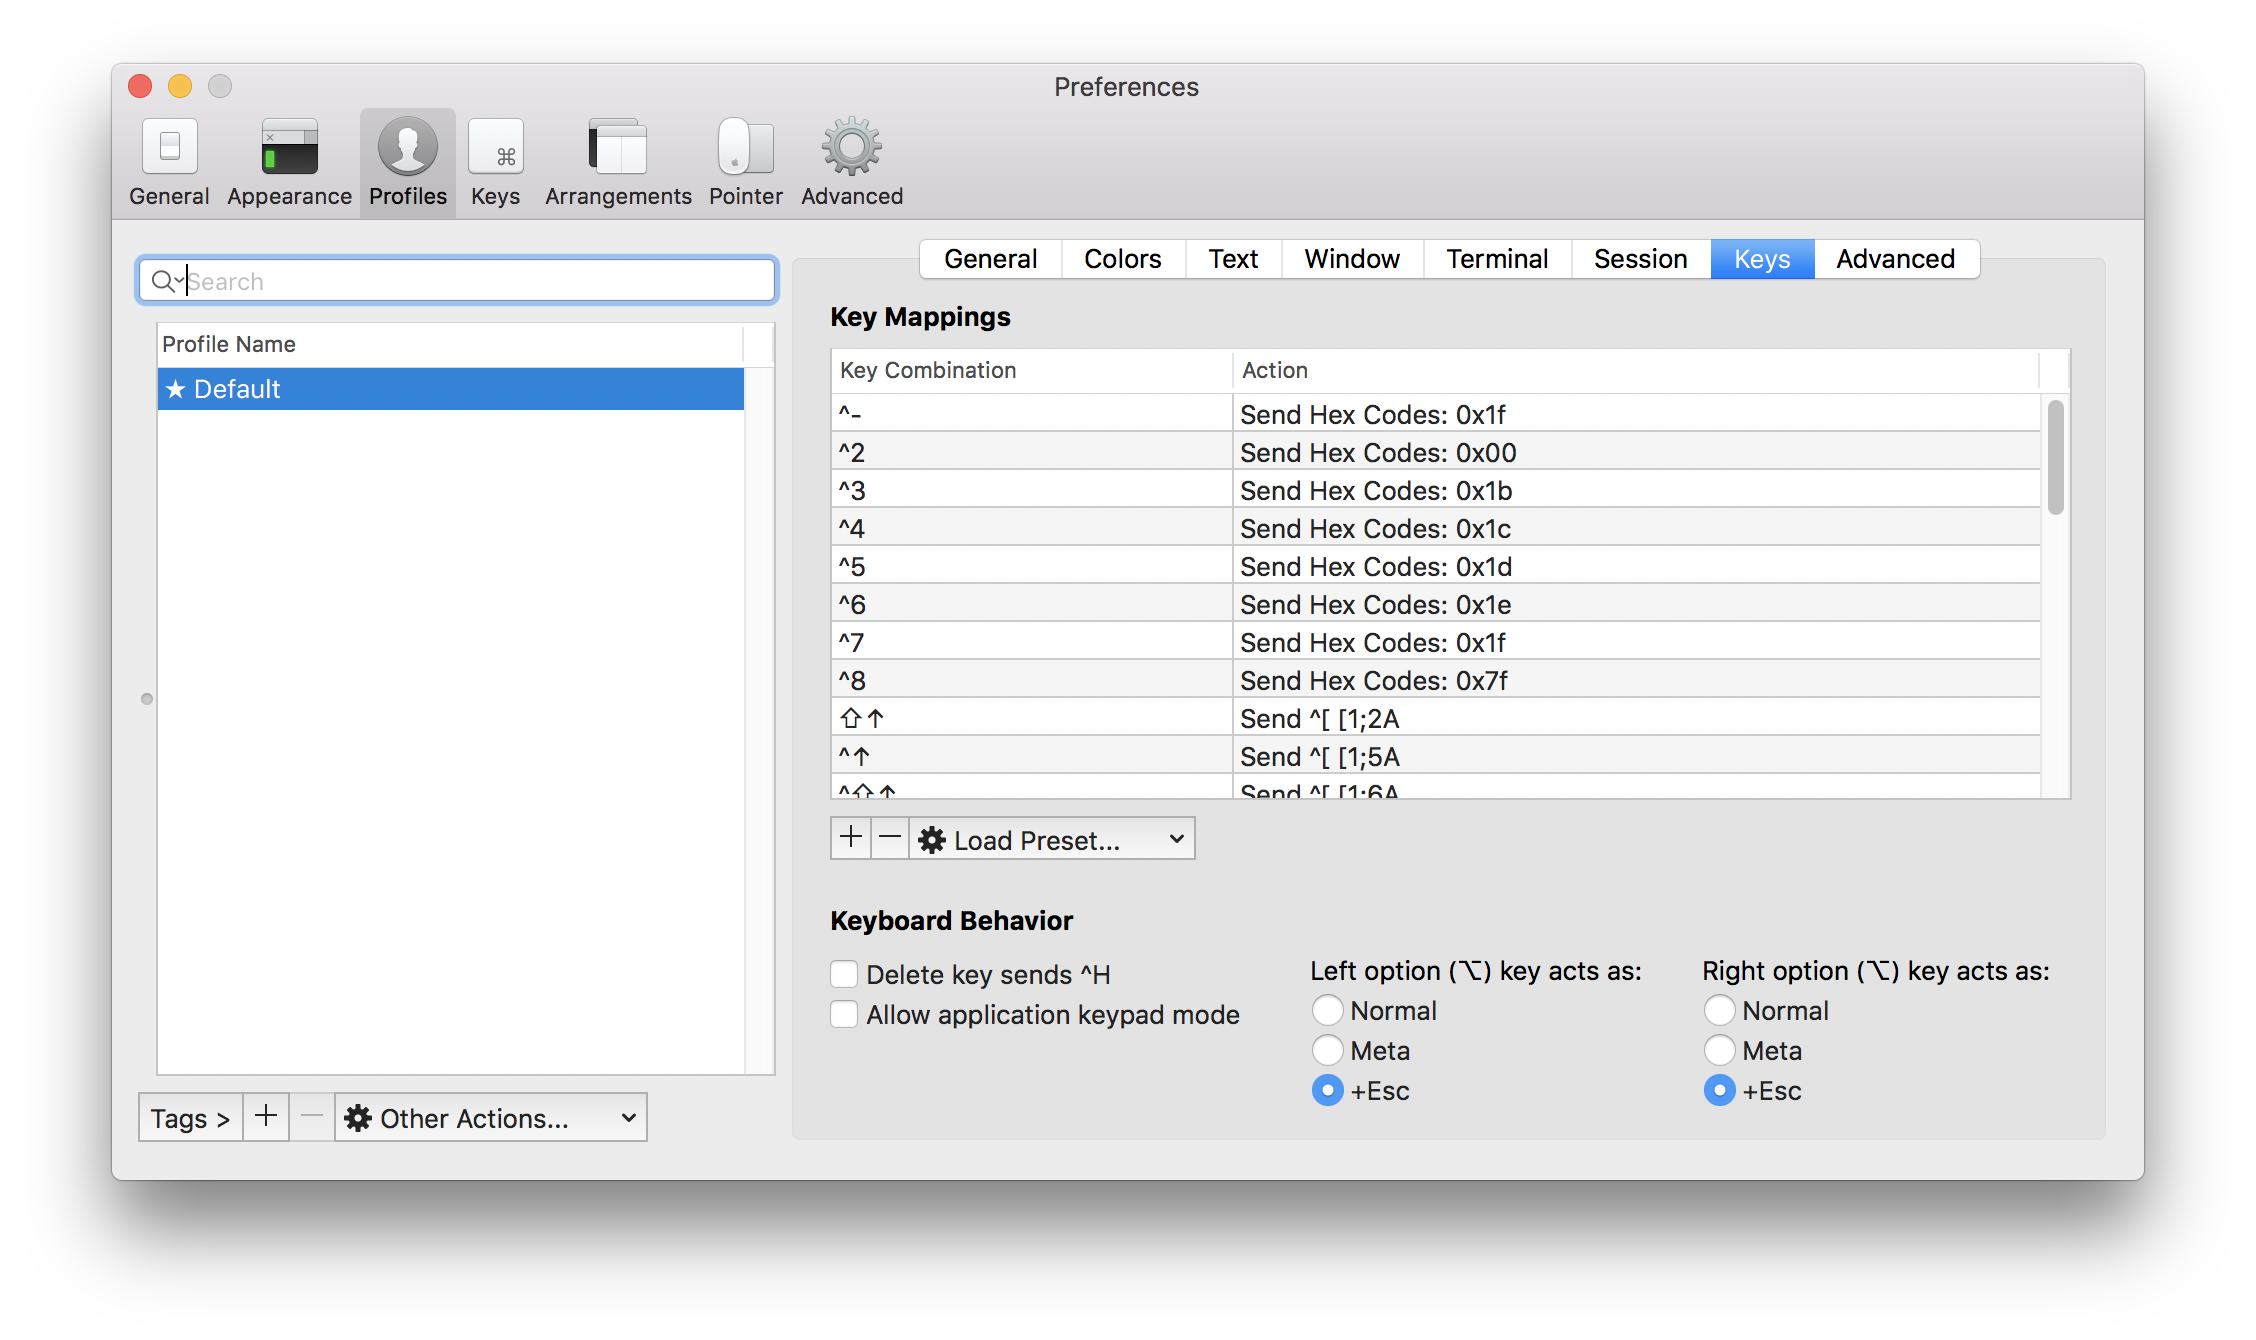
Open up your default profile and go to the Keys section and ensure that your option keys (⌥) are set to act as +Esc.
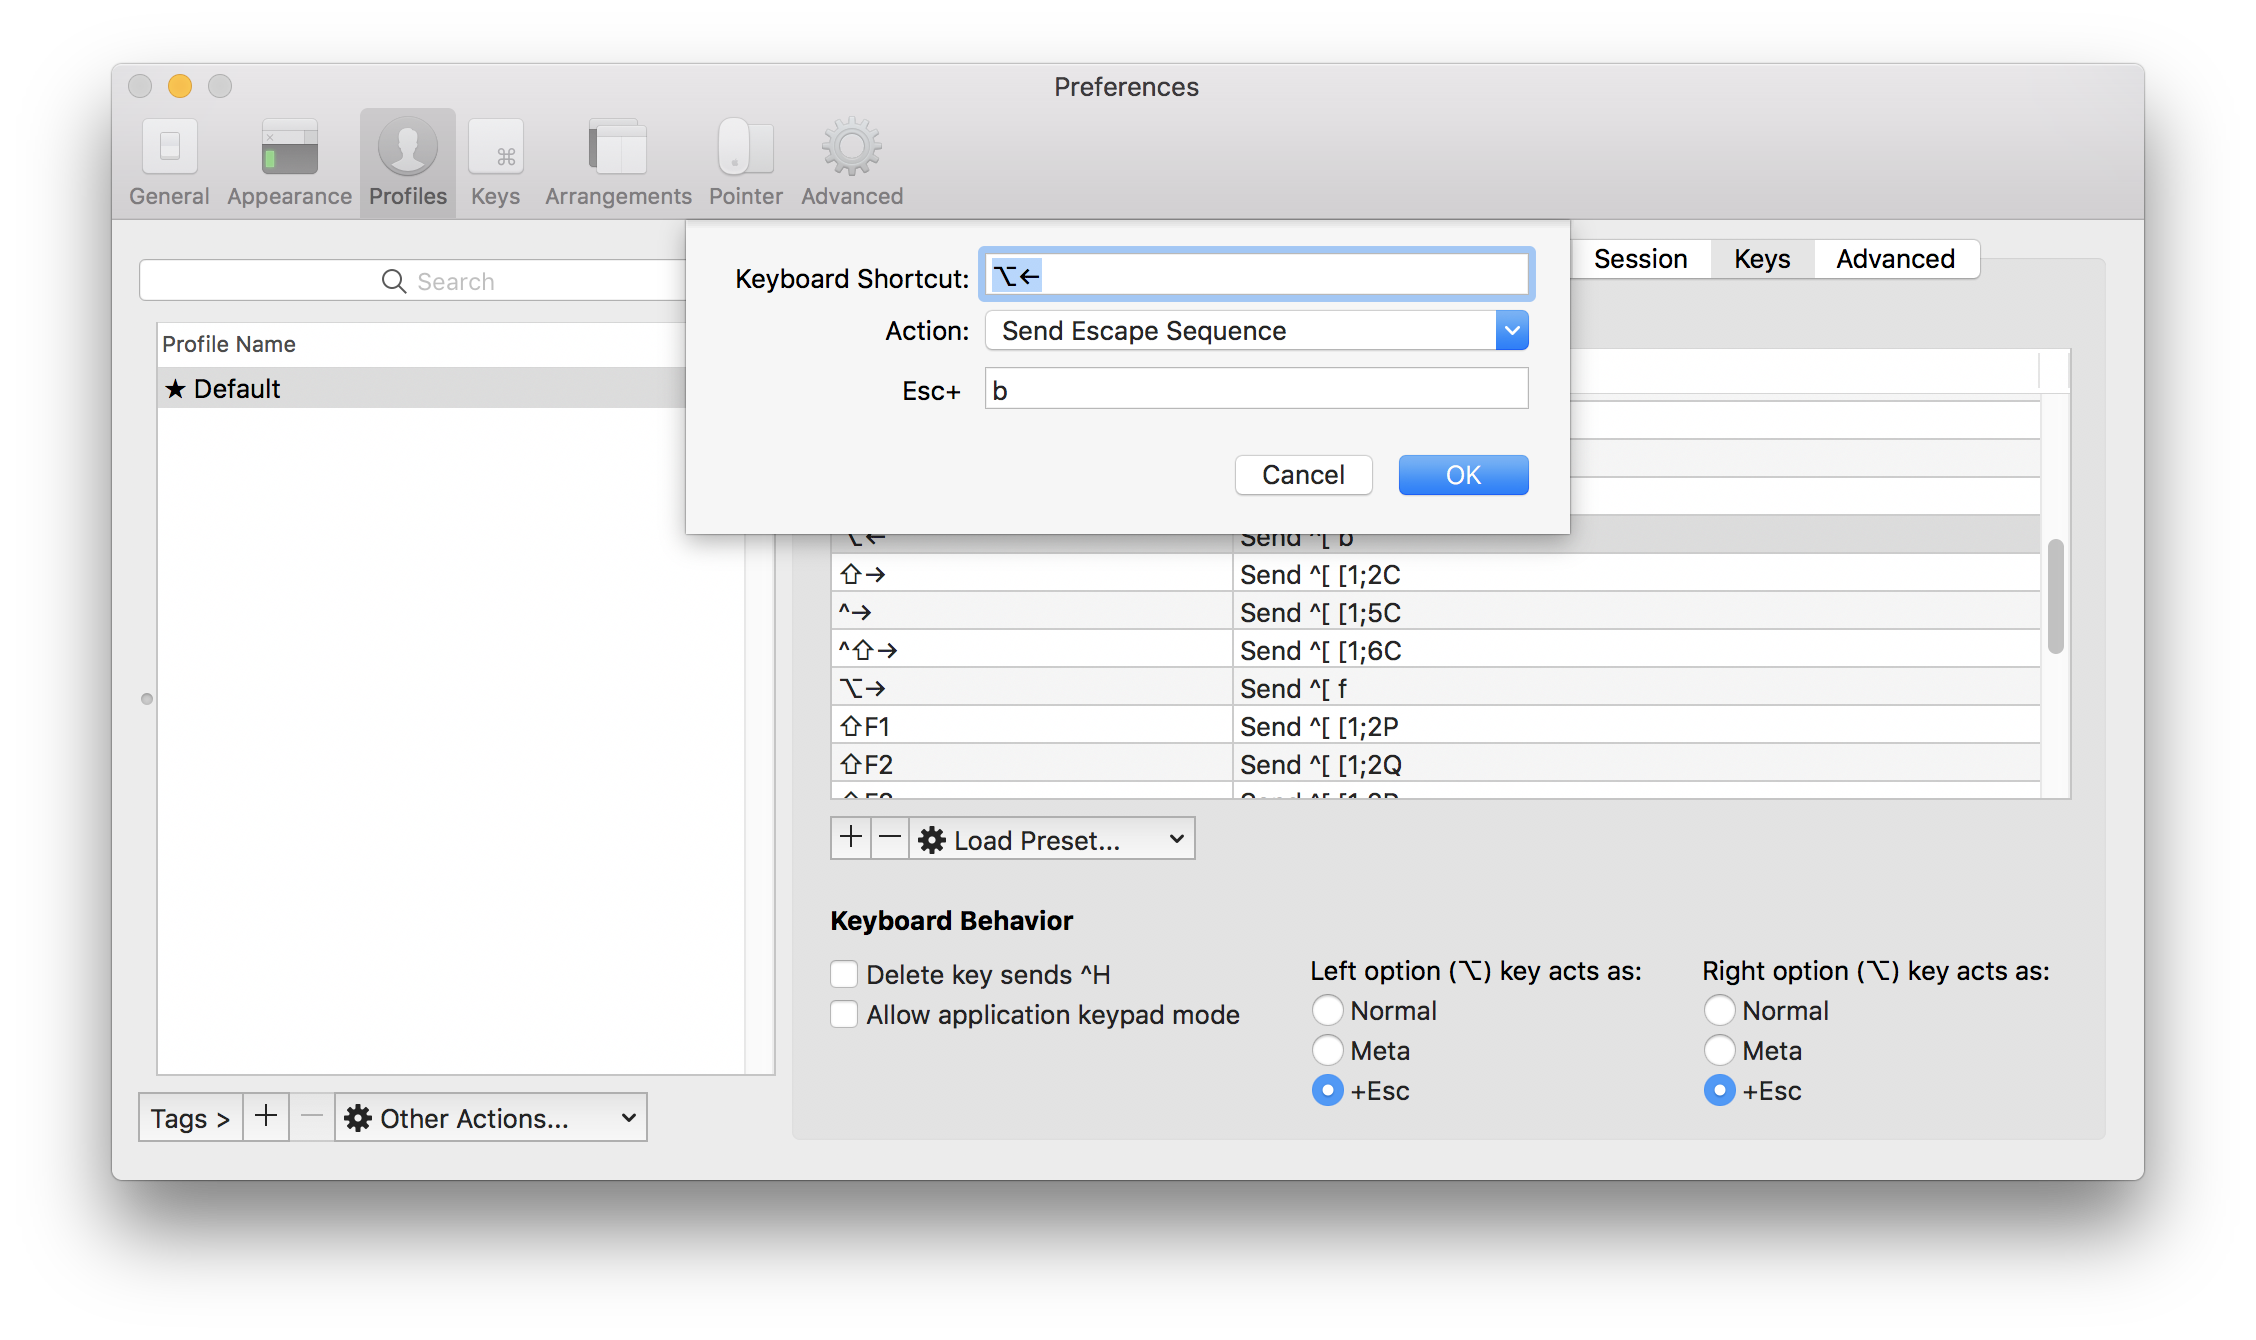
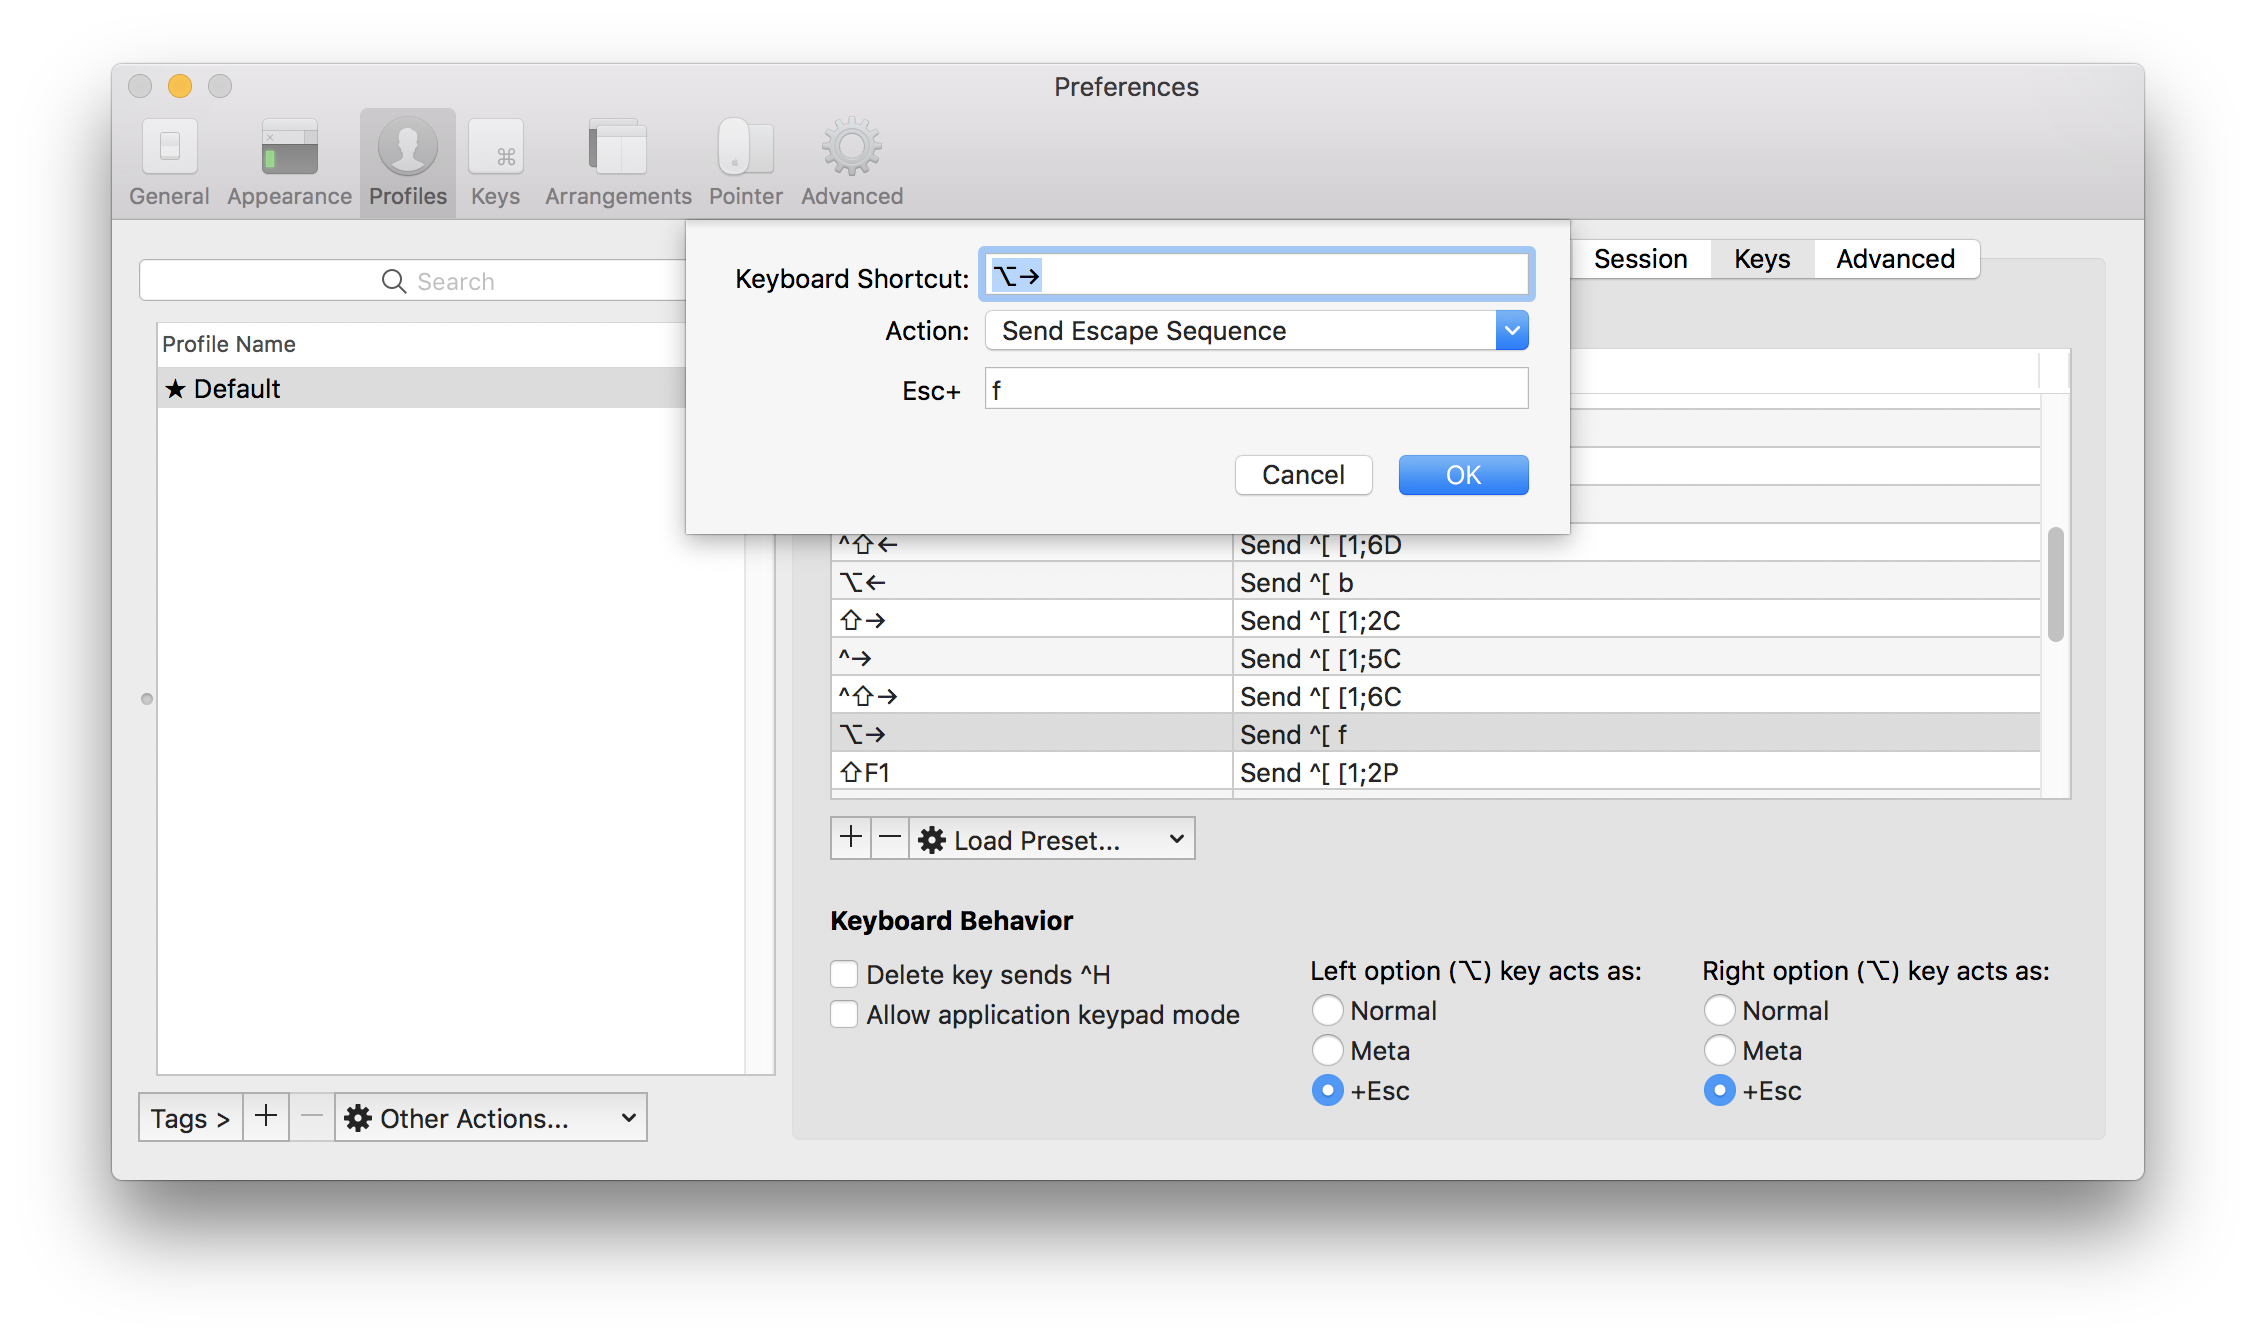
Then create 2 new key mappings. One for option (⌥) + left arrow (←) to send the escape sequence b and another for option (⌥) + right arrow (→) to send the escape sequence f.
Bonus
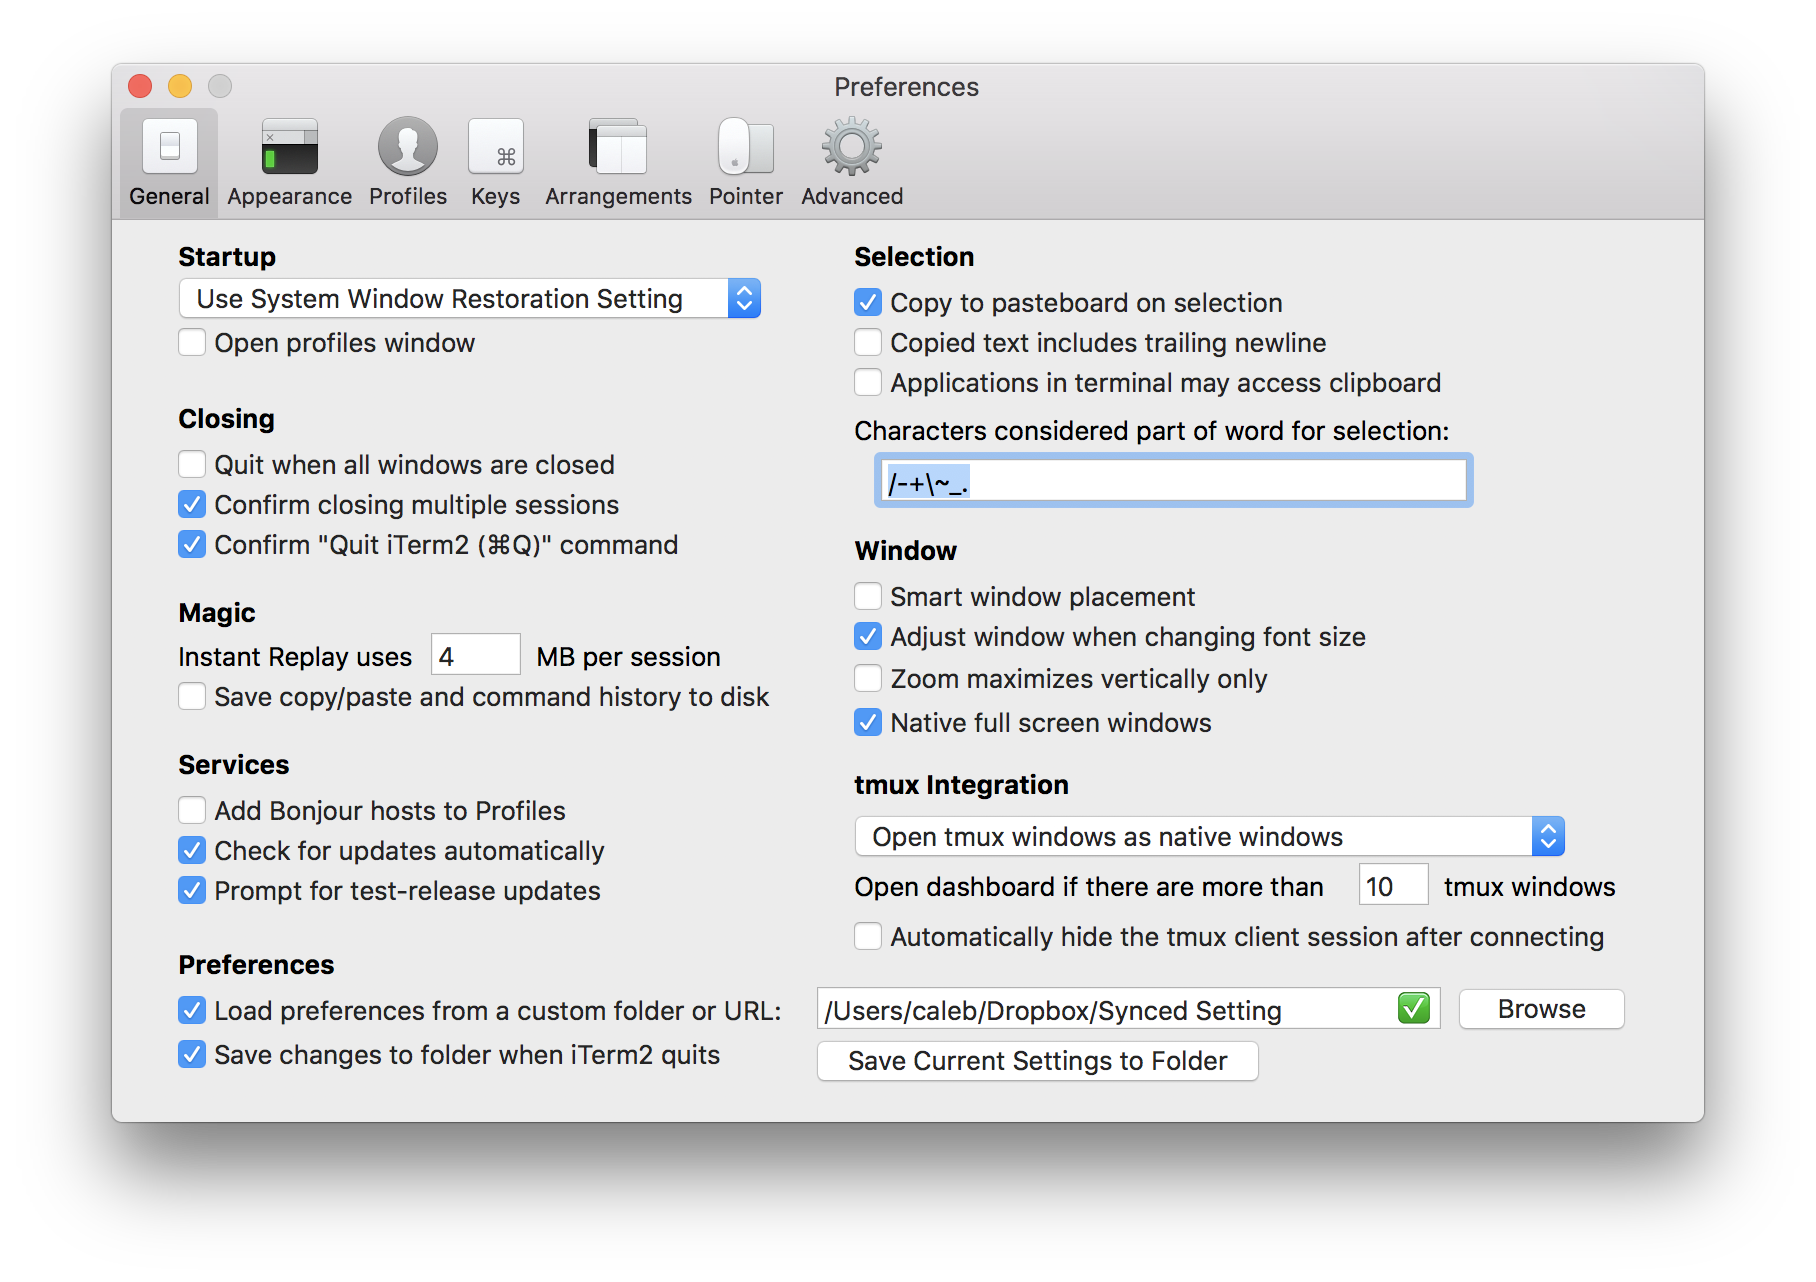
To avoid having to do this again next time you setup a new Mac I highly recommend using the "Load preferences from a custom folder or URL" feature and syncing that with a tool like Dropbox.
Always Learning
Would be curious to hear what ways you've customized your terminal experience to add "creature comforts" or increase your productivity. You can reach me on Twitter at @calebwoods.