As a Mac user I've always used Time Machine for local backups. The only issue is that it requires plugging a drive directly into your machine or buying an Apple Time Capsule. At $200 - $400 that's not a cheap option for NAS backups.
So I set out to create my own DIY Time Capsule using a 3TB Hard Drive and a Raspberry Pi. Below are the steps I went through to get things setup.
Note: I always recommend having multiple backup sources and because this setup requires mimicking Apple protocol there is potential for data loss. Use at your own risk.
Mounting USB Drive
To make the backup drive work directly plugged into the Raspberry Pi and my Mac, I formatted the drive as HFS+ Journaled. Out of the box, Raspbian (default Raspberry Pi OS) doesn't support HFS+ so we will need to add support.
$ sudo apt-get update
$ sudo apt-get install hfsprogs hfsplus
With that done we need to list the partitions of the drive we have plugged into the Raspberry Pi. This will give us the information we need to mount the drive. We'll use GNU Parted.
# start GNU Parted shell
$ sudo /sbin/parted

# once shell is loaded use `print` to show partition info
print

# output

Model: BUFFALO External HDD (scsi)
Disk /dev/sda: 3001GB
Sector size (logical/physical): 512B/4096B
Partition Table: gpt

Number  Start   End     Size    File system  Name                  Flags
 1      20.5kB  210MB   210MB   fat32        EFI System Partition  boot
 2      210MB   3000GB  3000GB  hfs+         Time Machine 3TB
From that information we can see that the disk is /dev/sda and we want to mount partition 2. We can now create our fstab entry.
# directory to mount drive
$ sudo mkdir -p /media/tm_3tb

# open fstab file; could use nano instead of vim
$ sudo vim /etc/fstab

# line to add to fstab file
/dev/sda2       /media/tm_3tb   hfsplus force,rw,user,auto        0       0
With the entry in the fstab file the drive will auto boot when we restart, but we need to manually mount now.
$ sudo mount -a
Setup AFP
Now that we have our drive connected to the Raspberry Pi, we need a way to for Time Machine to see the drive. Apple uses the AFP standard for network file sharing.
Unfortunately AFP is an Apple only "standard" so we will need to install the Netatalk package. Also, because we want to use a 3.x version of Netatalk we will need to install from the source.
$ sudo apt-get install git

# pull down source code
$ mkdir ~/code
$ cd ~/code

# clone netatalk repo
$ git clone git://git.code.sf.net/p/netatalk/code netatalk

# checkout version 3-1-7
$ cd netatalk
$ git checkout netatalk-3-1-7
With the Netatalk source checked out we'll now install the dependencies we need.
$ sudo apt-get install build-essential \
libevent-dev \
libssl-dev \
libgcrypt11-dev \
libkrb5-dev \
libpam0g-dev \
libwrap0-dev \
libdb-dev \
libtdb-dev \
libmysqlclient-dev \
libavahi-client-dev \
libacl1-dev \
libldap2-dev \
libcrack2-dev \
systemtap-sdt-dev \
libdbus-1-dev \
libdbus-glib-1-dev \
libglib2.0-dev \
tracker \
libtracker-sparql-0.14-dev \
libtracker-miner-0.14-dev \
bison \
avahi-daemon
With those dependencies installed, we just need to make and install Netatalk.
$ ./bootstrap
$ ./configure \
--with-init-style=debian-sysv \
--without-libevent \
--without-tdb \
--with-cracklib \
--enable-krbV-uam \
--with-pam-confdir=/etc/pam.d \
--with-dbus-sysconf-dir=/etc/dbus-1/system.d \
--with-tracker-pkgconfig-version=0.14
$ make
$ sudo make install
To verify that netatalk installed correctly run this command:
$ afpd -V
Edit Configuration Files
Now that we have everything installed we'll setup the configuration files.
In /etc/nsswitch.conf we need to change the line that reads:
hosts: files mdns4_minimal [NOTFOUND=return] dns mdns4
to
hosts: files mdns4_minimal [NOTFOUND=return] dns mdns4 mdns
Next we need to create a file at /etc/avahi/services/afpd.service with the following content:
<?xml version="1.0" standalone='no'?><!--*-nxml-*-->
<!DOCTYPE service-group SYSTEM "avahi-service.dtd">
<service-group>
    <name replace-wildcards="yes">%h</name>
    <service>
        <type>_afpovertcp._tcp</type>
        <port>548</port>
    </service>
    <service>
        <type>_device-info._tcp</type>
        <port>0</port>
        <txt-record>model=TimeCapsule</txt-record>
    </service>
</service-group>
Lastly we need to setup the /usr/local/etc/afp.conf with the follow content.
[Global]
  mimic model = TimeCapsule6,106

[Time Machine 3TB]
  path = /media/tm_3tb
  time machine = yes
Start Services
$ sudo service avahi-daemon start
$ sudo service netatalk start
Have these services start on boot:
sudo update-rc.d avahi-daemon defaults
sudo update-rc.d netatalk defaults
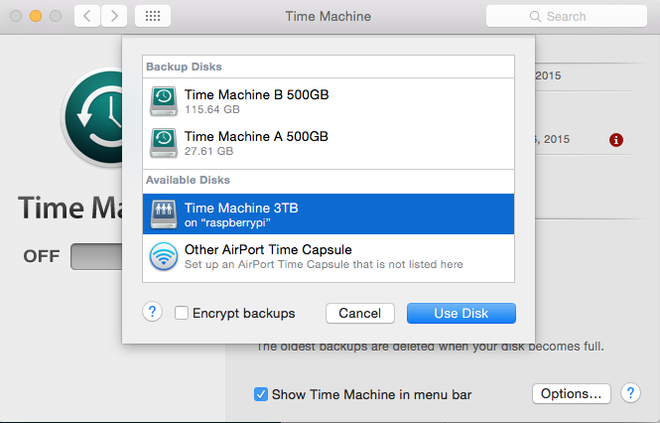
Setting up Time Machine
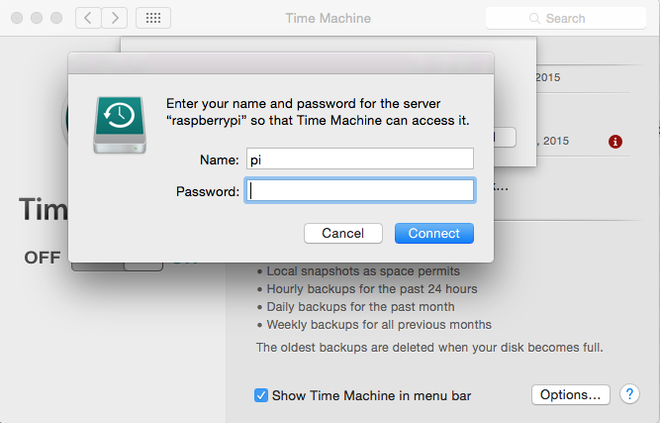
Now that you have things setup on the Raspberry Pi, we just need to open up Time Machine and add our new disk.
Once selected, use your SSH credentials to connect.
Viewing Backups
Once your first backup has completed you probably want to take a look at the files. Open up Finder and click on the raspberrypi menu item under Shared. Then click the Connect As button in the upper right corner and enter your login credentials to the Raspberry Pi. This will allow you to browse the share which should look something like this:
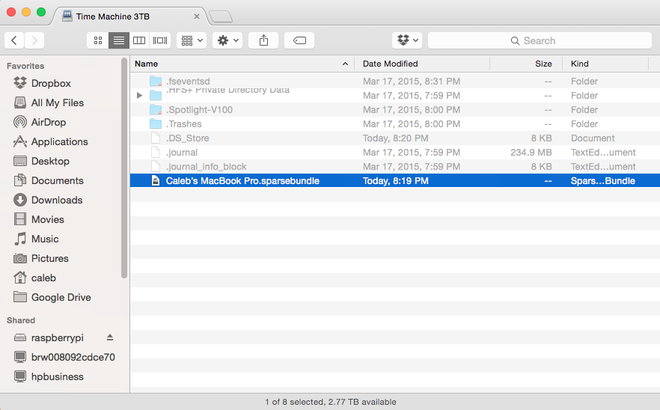
On the share you'll see a .sparsebundle file, which is where your backup is stored as an image. Double click on that file to mount the image.
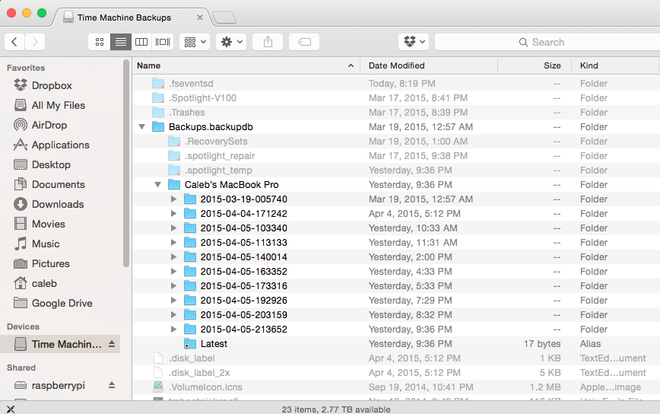
With the image mounted you will see a Time Machine Backups menu item in Finder under the Devices section.
Spin Down Idle Drive
Because our server will be running 24 hours a day, it's a good idea to have the backup drive spin down when not in use. The below commands will setup our drive to spin down after 30 minutes of no activity.
$ sudo apt-get install hdparm
$ sudo vim /etc/hdparm.conf

# add this entry at the bottom
command_line {
  hdparm -S 240 /dev/sda
}

# restart server
$ sudo reboot
Sources
And that's it. Your DIY Time Capsule is complete. I used information from the sources below:
- http://outcoldman.com/en/archive/2014/11/09/ubuntu-as-home-server-part-3-afp-server
- http://netatalk.sourceforge.net/wiki/index.php/InstallNetatalk3.1.7onDebian7Wheezy
- http://ubuntuforums.org/showthread.php?t=2105755 (Steps 2 and 3)
- http://www.havetheknowhow.com/Configure-the-server/Spin-down-idle-drives.html